2019년 3월 2일 토요일

안드로이드9 HTTP Error - ERR_CLEARTEXT_NOT_PERMITTED

- 안드로이드 Pie 버전 부터 http 제한이 있습니다.
안드로이드 Pie : https://www.android.com/versions/pie-9-0/


1. ERR_CLEARTEXT_NOT_PERMITTED 오류


WebView에서 http://www.google.com 으로 접속을 시도 하면 ERR_CLEARTEXT_NOT_PERMITTED 오류가 발생합니다.


2. 간단한 ERR_CLEARTEXT_NOT_PERMITTED 수정 방법
- AndroidManifest.xml 파일 수정.

<?xml version="1.0" encoding="utf-8"?>
<manifest xmlns:android="http://schemas.android.com/apk/res/android"
    package="simple.app.httperror">

    <uses-permission android:name="android.permission.INTERNET" />

    <application
        android:usesCleartextTraffic="true"
        android:allowBackup="true"
        android:icon="@mipmap/ic_launcher"
        android:label="@string/app_name"
        android:roundIcon="@mipmap/ic_launcher_round"
        android:supportsRtl="true"
        android:theme="@style/AppTheme">
        <activity android:name=".MainActivity">
            <intent-filter>
                <action android:name="android.intent.action.MAIN" />

                <category android:name="android.intent.category.LAUNCHER" />
            </intent-filter>
        </activity>
    </application>

</manifest>

- 결과


http://www.google.com 으로 접속을 시도하면 정상적으로 표시됩니다.
android:usesCleartextTraffic="true" 라인을 추가해서 처리하는 방법은 추천하지 않습니다.
3번 내용을 확인하고 올바른 방법으로 대응하는 것을 권장합니다.


3. 자세한 내용
https://android-developers.googleblog.com/2018/04/protecting-users-with-tls-by-default-in.html
https://developer.android.com/about/versions/pie/android-9.0-changes-28?hl=ko


ipTime 공유기 DNS 차단 풀기


- MTU 설정을 수동입력으로 600으로 수정 한 뒤 인터넷 연결 확인.


일반적인 MTU 값은 1500 입니다. 600으로 수정 한 뒤 차단된 사이트에 접속하시면
차단을 풀 수 있습니다.
주의 : 500 이하로 설정할 경우 인터넷 연결이 안될 수 있습니다.

그리고 DNS 주소를
1.1.1.1 이나 8.8.8.8을 사용 하는 것을 권장합니다.

MTU 설정이 낮을 경우 스트리밍 동영상을 시청할 때 끊김 현상이 발생할 수 있습니다.

2019년 2월 28일 목요일

안드로이드 adb 명령어


1. 패키지 검색
c:\> adb pm list packages -f
shell> adb pm list packages -f


- 특정 패키지 검색
pm list packages -f | grep com.google
 > grep를 사용할 때는 shell 에서 사용해야 합니다.(리눅스 명령어)


2. 파일 또는 디렉토리 가져오기
c:\> adb pull [가져올 디렉토리경로 또는 파일경로] [저장할 디렉토리경로 또는 파일경로]

- APK 파일 가져오기
adb pull /data/app/com.google.android.youtube-1ENzPRhJvNSoW2e8QWVfpQ==/base.apk /apk/youtube.apk


3. 실행중인 프로세스 확인
shell> ps -A

- 특정 프로세스 동작 확인
ps -A | grep com.google.android.youtube

Youtube 앱 실행 상태에서 확인


4. android.intent.action.MAIN 액티비티 찾기
shell> pm dump [패키지명] | grep -A 1 MAIN

dump로 확인하는 방식이므로 출력결과를 확인해야 함.

- 예
pm dump com.google.android.youtube | grep -A 1 MAIN


5. 액티비티 실행
shell> am start -a android.intent.action.MAIN -n [액티비티 경로]

- 예1
am start -a android.intent.action.MAIN -n com.google.android.youtube/com.google.android.apps.youtube.app.WatchWhileActivity


- 예2
adb shell am start -a android.intent.action.VIEW -d "https://www.google.com"
브라우저 실행


6. 스크린캡쳐
녹화방지 코드가 삽입된 부분은 캡쳐되지 않습니다.

c:\> adb shell screencap -p [저장경로]
shell> screencap -p [저장경로]


- 예
adb shell screencap -p /sdcard/DCIM/screencap.png

SD카드 DCIM 디렉토리에 저장됩니다.


7. mp4 화면녹화
사운드는 녹화되지 않습니다. 녹화방지 코드가 삽입된 부분은 녹화되지 않습니다.

c:\> adb shell screenrecord [파일경로]
shell> screenrecord [파일경로]


- 예

adb shell screenrecord /sdcard/DCIM/screenrecord.mp4


SD카드 DCIM 디렉토리에 저장됩니다.


8. 키 입력(keyevent, text, tap)
- 키 입력
c:\> adb shell input keyevent [KeyCode]
shell> input keyevent [KeyCode]

레퍼런스 : https://developer.android.com/reference/android/view/KeyEvent


- 텍스트 입력
c:\> adb shell input text [텍스트]
shell> input text [텍스트]
문장 단위는 ''로 묶어서 처리


- 클릭
c:\> adb shell input tap [x] [y]
shell> input tap [x] [y]


- 예
adb shell input keyevent KEYCODE_HOME
adb shell input keyevent 3

adb shell input text android
adb shell input text 'hello android'

adb shell input tap 100 100


2019년 2월 27일 수요일

안드로이드 RecyclerView 예제


- androidx 기준
- 클릭 이벤트, Diffutil 구현 샘플


1. app module dependencies 설정
2019.02.27 기준
implementation 'androidx.recyclerview:recyclerview-selection:1.0.0'

레퍼런스 : https://developer.android.com/jetpack/androidx/migrate


2. DiffUtil.Callback 작성

- DiffUtilCallback
public class DiffUtilCallback extends DiffUtil.Callback {
    private final List<TextItem> oldList;
    private final List<TextItem> newList;

    public DiffUtilCallback(List<TextItem> oldList, List<TextItem> newList) {
        this.oldList = oldList;
        this.newList = newList;
    }

    @Override
    public int getOldListSize() {
        return oldList == null ? 0 : oldList.size();
    }

    @Override
    public int getNewListSize() {
        return newList == null ? 0 : newList.size();
    }

    @Override
    public boolean areItemsTheSame(int oldItemPosition, int newItemPosition) {
        return oldList.get(oldItemPosition).getId() == newList.get(newItemPosition).getId();
    }

    @Override
    public boolean areContentsTheSame(int oldItemPosition, int newItemPosition) {
        return oldList.get(oldItemPosition).getText().equals(newList.get(newItemPosition).getText());
    }
}


3. RecyclerView.Adapter 구현

- TextItemAdapter
public abstract class TextItemAdapter extends RecyclerView.Adapter<Holder> implements View.OnClickListener {
    private final List<TextItem> list = new ArrayList<>();

    @Override
    public void onClick(View v) {
        ViewParent parent = v.getParent();

        if (parent instanceof RecyclerView) {
            RecyclerView rv = (RecyclerView) parent;

            // 클릭된 포지션 찾기
            int position = rv.getChildAdapterPosition(v);

            TextItem item = list.get(position);
            onItemClick(rv, v, position, item);
        }
    }

    /**
     * 클릭 이벤트
     *
     * @param rv
     * @param view
     * @param position
     * @param item
     */
    public abstract void onItemClick(RecyclerView rv, View view, int position, TextItem item);

    @NonNull
    @Override
    public Holder onCreateViewHolder(@NonNull ViewGroup parent, int viewType) {
        View view = LayoutInflater.from(parent.getContext()).inflate(android.R.layout.simple_list_item_1, parent, false);
        // 클릭 이벤트
        view.setOnClickListener(this);
        return new Holder(view);
    }

    @Override
    public void onBindViewHolder(@NonNull Holder holder, int position) {
        holder.bindItem(list.get(position));
    }

    @Override
    public int getItemCount() {
        return list.size();
    }

    public void updateList(List<TextItem> newList) {

        // 리스트 갱신
        DiffUtilCallback diffUtilCallback = new DiffUtilCallback(list, newList);
        DiffUtil.DiffResult result = DiffUtil.calculateDiff(diffUtilCallback);

        this.list.clear();
        this.list.addAll(newList);

        result.dispatchUpdatesTo(this);
    }
}


4. 샘플코드
소스코드
APK


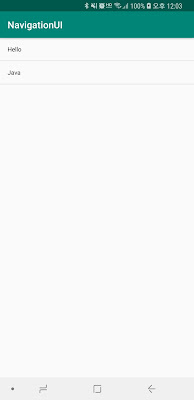
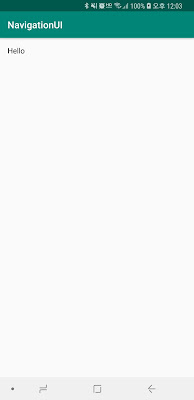
안드로이드 UI 네비게이션


- 네비게이션 레퍼런스
https://developer.android.com/topic/libraries/architecture/navigation.html?hl=ko


- Google Codelab
https://codelabs.developers.google.com/codelabs/android-navigation/#0


1. res/navigation/navi.xml 작성

<navigation xmlns:android="http://schemas.android.com/apk/res/android"
    xmlns:app="http://schemas.android.com/apk/res-auto"
    xmlns:tools="http://schemas.android.com/tools">

</navigation>


- 2019.02.27 기준 app module dependencies 설정
implementation 'android.arch.navigation:navigation-fragment:1.0.0-beta02'

*** xml 문서 정의 후 해당 문서를 오픈하면 자동으로 dependencies 설정 팝업이 표시됩니다.


2. activity_main.xml 작성

<?xml version="1.0" encoding="utf-8"?>
<FrameLayout xmlns:android="http://schemas.android.com/apk/res/android"
    xmlns:app="http://schemas.android.com/apk/res-auto"
    xmlns:tools="http://schemas.android.com/tools"
    android:layout_width="match_parent"
    android:layout_height="match_parent"
    tools:context=".MainActivity">

    <fragment
        android:id="@+id/host_fragment"
        android:name="androidx.navigation.fragment.NavHostFragment"
        android:layout_width="match_parent"
        android:layout_height="match_parent"
        app:defaultNavHost="true"
        app:navGraph="@navigation/navi" />

</FrameLayout>


3. MainActivity 작성

public class MainActivity extends AppCompatActivity {

    @Override
    protected void onCreate(Bundle savedInstanceState) {
        super.onCreate(savedInstanceState);
        setContentView(R.layout.activity_main);
    }

    @Override
    public boolean onSupportNavigateUp() {
        return Navigation.findNavController(this, R.id.host_fragment).navigateUp();
    }
}


4. Fragment 생성 후 navi.xml 수정
<navigation xmlns:android="http://schemas.android.com/apk/res/android"
    xmlns:app="http://schemas.android.com/apk/res-auto"
    xmlns:tools="http://schemas.android.com/tools"
    app:startDestination="@id/listFragment">


    <fragment
        android:id="@+id/listFragment"
        android:name="app.example.navigationui.ListFragment"
        android:label="fragment_list"
        tools:layout="@layout/fragment_list" >
        <action
            android:id="@+id/action_listFragment_to_textFragment"
            app:destination="@id/textFragment"
            app:popUpTo="@+id/listFragment" />
    </fragment>
    <fragment
        android:id="@+id/textFragment"
        android:name="app.example.navigationui.TextFragment"
        android:label="fragment_text"
        tools:layout="@layout/fragment_text" >
        <argument
            android:name="text"
            app:argType="string"
            android:defaultValue="-" />
    </fragment>
</navigation>


5. 샘플코드
소스코드
APK


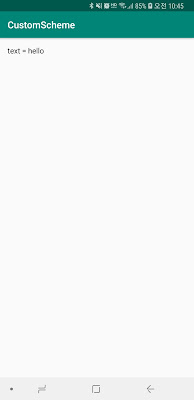
안드로이드 커스텀 스키마


- 커스텀 URL 스키마 주소를 통해 Activity를 실행
주소 : custom://page?text=hello


1. CustomSchemeActivity 생성

public class CustomSchemeActivity extends AppCompatActivity {

    @Override
    protected void onCreate(Bundle savedInstanceState) {
        super.onCreate(savedInstanceState);
        setContentView(R.layout.activity_custom);

        // uri 읽기
        Uri uri = getIntent().getData();

        if (uri != null) {
            // 파라미터 읽기
            String text = uri.getQueryParameter("text");

            if (TextUtils.isEmpty(text) == false) {
                // 파라미터 값 표시
                TextView textView = findViewById(R.id.text);
                textView.setText(String.format("text = %s", text));
            }
        }
    }
}


2. AndroidManifests 설정

<activity android:name=".CustomSchemeActivity">
<intent-filter>
<action android:name="android.intent.action.VIEW" />

<category android:name="android.intent.category.DEFAULT" />
<category android:name="android.intent.category.BROWSABLE" />

<data
android:host="page"
android:scheme="custom" />
</intent-filter>
</activity>


3. 동작 확인
 - Intent 동작
startActivity(new Intent(Intent.ACTION_VIEW, Uri.parse("custom://page?text=hello")));


- URL 동작
주소 : custom://page?text=hello


4. 샘플코드
소스코드
APK


2019년 2월 26일 화요일

MTU 변경하기


- 윈도우10 기준입니다.
- 윈도우7의 경우 1, 2, 4번을 설정합니다.


1. CMD 창을 관리자 모드로 실행


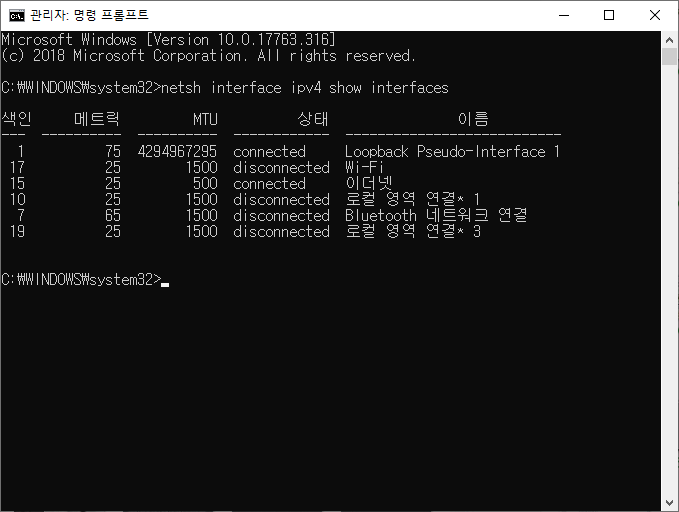
2. 이더넷 인터페이스 정보 확인
netsh interface ipv4 show interfaces


3. global minmtu 값 설정
netsh interface ipv4 set global minmtu=500 store=active

색표시가 된 부분을 수정하시면 됩니다.


store 속성을 active로 할 경우 시스템 재부팅 후 설정이 풀립니다.
persistent값으로 설정하면 재부팅 후 설정이 유지 됩니다.


4. 인터페이스 MTU 변경
netsh interface ipv4 set subinterface "15" mtu=500 store=active

색표시가 된 부분을 수정하시면 됩니다.


store 속성을 active로 할 경우 시스템 재부팅 후 설정이 풀립니다.
persistent값으로 설정하면 재부팅 후 설정이 유지 됩니다.